Please note that for PRF Plugs and Membranes, remember to check what kinds of tubes you are using, glass or silica-coated.
When operating the centrifuge and related accessories, strict surgical and contamination control protocols, including, but not limited to, sterilization of all instruments prior to any use, must be followed to ensure patient safety and eliminate any risk of contamination. We are not affiliated in any manner whatsoever with Choukroun or his company Process for PRF. It is up to each clinician to keep up-to-date with the research for new PRF protocols. As the centrifuge is manual, you can always adjust the RPM/Time to fit the RCF value of any PRF protocol.
Overview
When operating the centrifuge and related accessories, strict surgical and contamination control protocols, including, but not limited to, sterilization of all instruments prior to any use, must be followed to ensure patient safety and eliminate any risk of contamination.
Blood Drawing for PRF
“The success of this technique entirely depends on the speed of blood collection and transfer to the centrifuge. Indeed, without anticoagulant, the blood samples start to coagulate almost immediately upon contact with the tube glass, and it takes a minimum of a few minutes of centrifugation to concentrate fibrinogen in the middle and upper part of the tube. Quick handling is the only way to obtain a clinically usable PRF clot. If the duration required to collect blood and launch centrifugation is overly long, failure will occur: The fibrin will polymerize in a diffuse way in the tube and only a small blood clot without consistency will be obtained.”
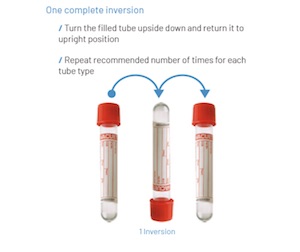
![]() IMPORTANT: When using silica-coated tubes, please remember to gently invert (turn upside down and right side up - do NOT shake) the tube 5 to 8 times after drawing blood and before placing the tubes in the centrifuge. This helps activate the clotting.
IMPORTANT: When using silica-coated tubes, please remember to gently invert (turn upside down and right side up - do NOT shake) the tube 5 to 8 times after drawing blood and before placing the tubes in the centrifuge. This helps activate the clotting.
See: Platelet-rich fibrin (PRF): A second-generation platelet concentrate. Part I: Technological concepts and evolution, link: Second Generation > Remember one single rule: The blood drawing has to be as fast as possible. It’s essential for the PRF clot quality. > It is never recommended to do the blood aspiration with a syringe! The tubes are under vaccum. The blood stops being collected when the tube is full. When the tube is full, place it in the centrifuge.
Tube Selection:
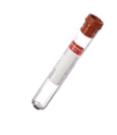
For A-PRF/L-PRF (PRF Plugs and Membranes, and A-PRF Liquid): You must use the Red Cap, Tubes
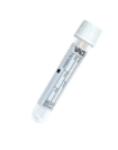

For i-PRF (injectable liquid PRF): You must use the White Cap, Greiner Plastic Tubes or the blue BioPRF Liquid Tubes.
Wipe down Tubes: It is best practice to wipe down the entire surfaces of any tubes you intend to use for the PRF, with disinfectant wipes and/or alcohol prior to drawing the blood.
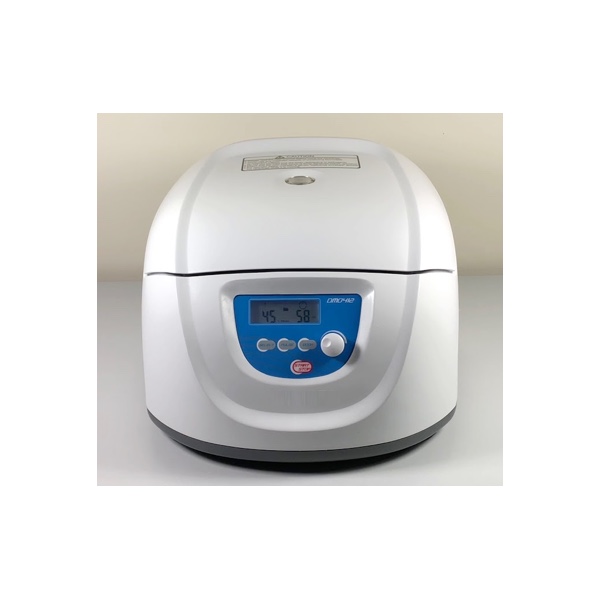
Centrifuge Preparation for PRF
Ensure proper support for Tubes before centrifugation:
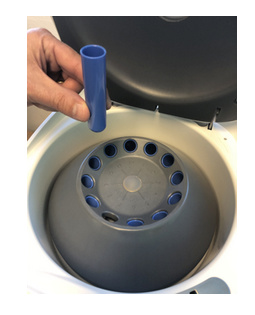
When placing tubes into the Centrifuge, you must ensure that the tubes are supported from the bottom and not hanging by their caps. Use the provided adaptors, A10P15, that comes with your centrifuge (see page 14 of User Guide), to properly secure the tubes. Place these adaptors in the centrifuge, prior to inserting tubes
IMPORTANT: Balance the Tubes!
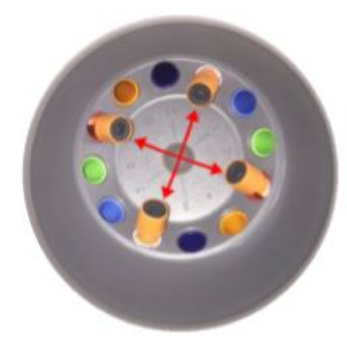
Number of tubes collected: at least 2, max 12, always BALANCED 2 by 2. ![]() You MUST balance the tubes in the centrifuge (opposite, 2 by 2). If you do not do this, you’ll get vibrations during the centrifugation and failure will occur. If you haven’t collected an even number of tubes, then prepare a tube with water. This tube with water will be used to obtain an even balance with the other tubes.
You MUST balance the tubes in the centrifuge (opposite, 2 by 2). If you do not do this, you’ll get vibrations during the centrifugation and failure will occur. If you haven’t collected an even number of tubes, then prepare a tube with water. This tube with water will be used to obtain an even balance with the other tubes.
Before you start the Centrifuge, be sure to set and/or verify the RPM and running time based on the PRF spin protocols listed below, and as shown in our videos. The machine will remember your last setting, so if you routinely use the same PRF protocol, and you have already adjusted the settings you can just use your last setting without the need to adjust anything.
A-PRF Glass Tubes Only (Plugs and Membranes) = 1300 RPM for 8 minutes. Low-centrifugation protocol.
L-PRF Glass Tubes Only (Plugs and Membranes) = 2400 RPM for 12 minutes.
L-PRF Silica-Coated Tubes (Plugs and Membranes) = 2,400 RPM for 12 to 14 minutes (some patients require 18 minutes 1.
i-PRF (Injectable PRF) Female = 700 RPM for 3 minutes with white tubes
i-PRF (Injectable PRF) Male = 700 RPM for 4 minutes with white tubes.
To properly set the RPM and running time, please read and follow the instructions below, and watch the video at the bottom of the page. These videos are also on our recommended PRF video page.
Briefly, the steps for setting the RPM and Time are follows:
- Press the Select Button to Select the RPM setting (the setting will blink when it is selected)
- Turn the white knob on the right to set the correct RPM
(Note: The number needs to be multiplied by 100, as the setting is X100 RPM, so a 13 setting is equivalent to 1300 RPM, 7 is equivalent to 700 RPM).
- Press Select again to save the RPM Setting and move to the Time (Minute) Setting. (Note: If after setting the RPM, you hit Select and a force setting appears, i.e. x100 g setting, simply ignore this setting by hitting Select again, which will move you to the Minute/Time setting. The force x100g setting is set automatically by your RPM setting and should not be changed).
- Turn the knob on the right to set the correct time. The time will blink as you are setting it.
- Once the time/minute is set, wait a few seconds till the time stops blinking.
- If nothing is blinking on the screen, then the setting is saved.
- The Settings for your spin cycle will now appear on your screen. If the settings are correct, ensure again that the lid to the centrifuge is completely closed, and press the start button.
- After you press Start, the RPM will go back to zero initially, and then it will take a few seconds for the RPM to increase to the proper level.
- When the spin cycle is complete, the machine will beep several times and the lid will pop open automatically.
- The machine will remember your last setting, so if you routinely use the same PRF protocol, and you have already adjusted the settings as per the prior steps, you can just use your last setting without the need to adjust anything.
IMPORTANT: Never Press the “Door” button while the centrifuge is running. If you need to stop the centrifuge for whatever reason, press the stop button and wait for the RPM to hit 0 and the Centrifuge to beep to signal a complete stop. IMPORTANT: Ignore the Pulse Button on the Centrifuge: There is no reason to ever use the Pulse button for PRF applications.
PRF Spin Protocols
The protocols below are the standard protocols for the specifications of this particular centrifuge. There are other PRF protocols described in the literature, and at various courses, as researchers are constantly tweaking their methods. You should inquire with the appropriate instructor, what RPM, time, and handling you need for a specific protocol. All protocols listed below are for information purposes ONLY. It is assumed that the user has been properly trained in the various protocols.
Remember: All Instruments must be sterilized prior to every use.
I. PRF Plugs and Membranes) = RED tube
Glass Tubes: 1300 rpm / 8mn.
Silica-coated tubes: Use the original high-speed PRF protocol use 2,400 RPM for 12 to 14 minutes.
For making clots and membranes. Draw the blood fast and spin them. At the end of the spin, Remove the tube and the caps, place the tubes in the sterile tube holder and let them rest a few minutes to achieve the full clotting. Remove the clots and put them in the Box and cover with the white crusher.
- Take the fibrin clot into the opened tube with the sterile PRF forceps.
- To separate the fibrin clot from the red cells easily: Put the clot on the mini-tray covered with a gauze and use the scissors to peel off the red clot.
- Put the PRF clots on the Box grid and cover them with the tray, then put the lid on (always).
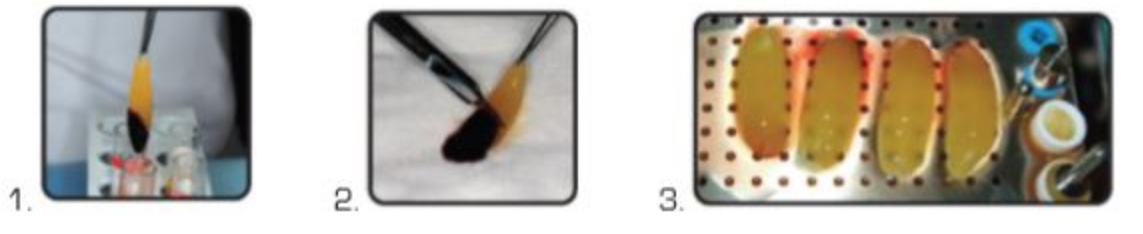
- Make membranes: Put the clots after separation on the grid. Cover with the crusher and then put the lid. The membranes will be ready for use after 2 min. The membranes remain intact (without any dehydratation and with a constant thickness). The exudate collected in the bottom is very rich in proteins (Fibronectin and Vitronectin).
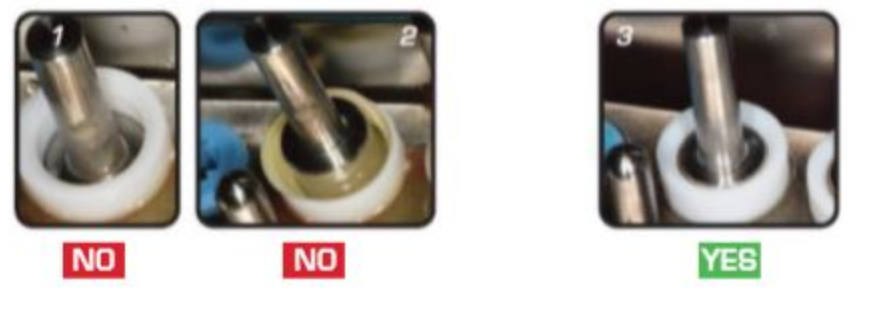
- Make plugs of PRF: Place a clot in each cylinder and push it with the metal piston. The piston musn’t be partially or fully depressed (photo 1 and 2). It must be stopped at the edge of the white Teflon cylinder (photo 3). The plugs can be used immediately for socket extractions filling.
- Keep the exudate recovered at the bottom of the box: To hydrate Biomaterials, To flush the surgical sites, sockets and cysts, and To preserve the autogenous bone blocks (rather than in saline)
The PRF can be used as membranes in the following situations:
As a whole membrane: on the implants after being punched, on bone graft, under the gingiva, on the palate: covering the harvest area of the connective tissue (membrane will then be sutured), etc…
Membrane(s) cut into small pieces: with the scissors supplied. These fragments will be mixed with biomaterials.
In the sinus-lift: apply one or two PRF membranes folded twice under the Schneiderian membrane with the PRF Pad. Mix 1 to 2 membranes cut into small pieces with the biomaterial. Use 1 or 2 membranes for a lateral closure of the sinus. If the sinus membrane is punctured, it can be repaired using 1 or 2 PRF membranes folded twice. PRF immediately sticks to the Schneiderian membrane.
In the extraction sites, it is preferable to use the cylinders prepared in the PRF BoX. To compress the PRF plugs in the socket, use a gauze hydrated and not a metal instrument.
II. i-PRF (Injectable PRF) Female = White plastic Tube from Greiner or BLUE BioPrf Liquid Tube
700 rpm / 3mn protocol for female gender At the end of the spin, the supernatant is a liquid and stays liquid at least around 10 - 12mn.
i-PRF Male = White plastic Tube from Greiner
700 rpm / 4mn protocol for male gender The male gender has more red cells (than female) and the blood is more heavy. This is why we spin the blood one minute more.
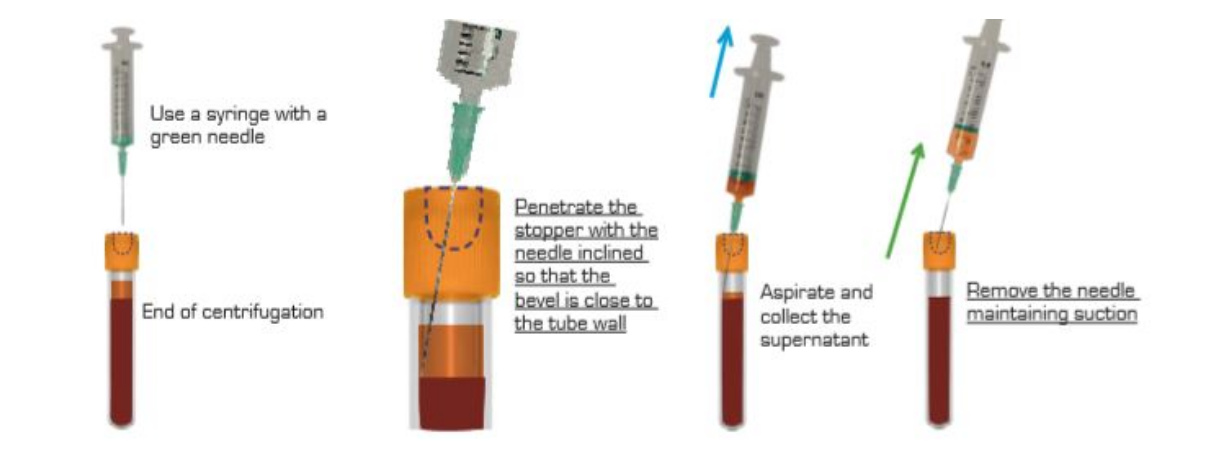
- At the end of the spin, a orange supernatant will form on the surface.
- Penetrate the cap with a 21G needle (green) mounted on a syringe.
- Place the bevel of the needle in the middle of the i-PRF supernatant, against the wall of the tube (better visibility).
- Aspirate until the level of the red blood cells raises up to the needle bevel.
- Remove the needle maintaining suction.
- i-PRF remains liquid for about 10 -12 minutes, then it will clot. The injection will have to be done before the end of these 10 -12 minutes.
How to use i-PRF
Remember: The blood for i-PRF must be drawn just before injection. It cannot be prepared in advance.
The i-PRF can be injected:
- Into the soft tissues
- In the bone graft. Mix the granules with the A-PRF (as usual), and pour the i-PRF drop by drop to avoid an overflow. Wait a few seconds and go on until you obtain the complete coagulation of the biomaterials (in less than a minute). If you inject too fast, the i-PRF will overflow from the bone graft!
- Into the sinus, after the filling . The granules will be fixed and coagulated.
- The i-PRF can be used to coagulate the biomaterials before application. This is the steak technique.
III. A-PRF Liquid (Sticky Bone with low centrifugation) = RED ONLY tube
1300 rpm / 5mn (Note: Some users report better results with 1200 rpm/5mn). For silican-coated tubes add 5mn.
Use the red tubes. Watch this video: https://www.youtube.com/watch?v=8lbh_USKwMM
- Set the Centrifuge to 13 x 100 rpm / 5 minutes for A-PRF Liquid.
- At the end of the spin, the lid will open automatically. Remove tubes needed and remove the liquid immediately with a syringe (see last step below).
- Optional: If you want to create plugs/membranes from remaining tubes, if any, set the timer again for the remaining tubes, if any, in the Centrifuge to 3 minutes. At the end of the 2nd spin, the lid will open automatically and you will have plugs/membranes.
- Remove the cap and draw the Liquid A-PRF (1st tubes removed after 5 minutes) with a syringe and a needle. (21G or 18G). Draw the supernatant and drop it on the bone graft (already in another bin) . After a short time, the liquid is now a gel and the bone graft is embedded into the fibrin clot. Press it with the pad and shape it.
Centrifuge Manual
You can access the Centrifuge Manual here. (PDF Download)
Setting the RPM

PRF Course Highlights
References:
-
Excellent Reference for L-PRF: Complete Instructions for Various Situations
-
Choukroun J, et al. Reduction of relative centrifugation force within injectable platelet-rich-fibrin (PRF) concentrates advances patients’ own inflammatory cells, platelets and growth factors: the first introduction to the low speed centrifugation concept. Eur J Trauma Emerg Surg. 2018; 44(1): 87–95
-
Fujioka-Kobayashi M et al. Optimized Platelet-Rich Fibrin With the Low-Speed Concept: Growth Factor Release, Biocompatibility, and Cellular Response. J Periodontol. 2017 Jan;88(1):112-121. Epub 2016 Sep 2.